8.01.2013

Add A Photo To A Card

 Summertime is coming to an end and with all the fun activities that went on there are guaranteed to be lots of pictures.  Today I'm sharing an idea for you to show off and use all those fun pictures.
 
Add a photo to a card
 

The photos we take are extremely personal and tell a story.  What a beautiful gift to give someone a picture card that is both personal and visually pleasing.  For this card I printed out a photo I took with instagram and added a greeting "aloha" to match the scene in the picture.


7.31.2013

Scrapbooking Your Travel Photos

Hi There! Rochelle again closing out the month with a travel layout with lots of photos! I take so many photos while on vacation it’s so hard to scrap them all.  For this layout I wanted to use multi photos but not have the layout  photo heavy.  To do this, I printed 4 photos a little bit smaller than a 2x3 to fit across the page.  I use the beautiful shades of blue and orange from the SunKissed Collection to highlight the ocean and my clothing from the photos.  I also added stitching and twine to add dimension to my layout. 

Here are some close ups: 


Supplies: GCD Studios SunKissed Collection - Patterned Papers: Weekend Adventures (#2062), Sassy Swimmers (#2057); Swim Lessons (#2060), Pretty Swimsuit (#2061), Tickled with Sunshine (#2065), Lazy Days (#2067); Paperclips (#2035); Label Stickers (#2033); Die-Cut Borders (#2036); Alpha Stickers (#2032); Glitter Epoxy Dots (Kathy Davis Happiness Collection #1868); Other: mini alphas, staple and date stamp.


7.30.2013

Girls Weekend!

Girls Weekend!!
Doesn't that sound fun? Summertime is the perfect time to gather up your besties and head out on an adventure!! And I have the perfect card for you to create to invite them to come along!

The colors, patterns and elements in the Sunkissed collection made it super easy to create my card.


I started with the appropriately named "Weekend Adventures" for the card base. I then trimmed a strip from the "Calendar Girl" paper and marked "x's" with a marker to indicate the weekend of fun. I adhered the calendar strip on an angle for interest. Next, I added some white alpha stickers from the Sunkissed collection and added some mini black stickers to finish the sentiment.
I just fell in love with the cluster of flowers, so I fussy cut them from the paper and adhered them to the corners of the card with foam tape.
I added pearls to the flower centers for a sweet, feminine touch.
And finally, I added the car sticker to finish the card.  Here's a tip: I like to adhere stickers to cardstock first, then fussy cut them out so that I can adhere them to my cards with foam tape for dimension. And in this case, I also outlined the sticker with a black paint pen to provided added depth/dimension to the sticker.

Thanks for stopping by today! Hope you enjoyed my 'girls weekend' card!!
xoxo
rae


GCD Studios Supplies:
Sunkissed Collection: 6 x 6 paper pad #2069; Alpha Stickers #2070; Label Stickers #2071

Other Supplies: white cardstock, pearls, mini alpha stickers, black marker, paint pen, foam tape, corner rounder punch


7.29.2013

Hello Project Life

Suzanna here to share with you a layout about travel. We travel a lot as a family: by car, by plane, by foot. Not much by boat but we have done that. My kids are seasoned travelers, thank goodness. We drive a fair amount. It's easier to haul the comforts of home with us. Heidi's Special Delivery collection is a fantastic color scheme and theme for a road trip. Done here in Project Life style.
The journal cards aren't quite 3x4 so I backed each one with cardstock or coordinating patterned paper. Each card reflects the theme of the layout is it's own way.
I just love that little map of the US. Originally I was going to hand stitch the route from Virginia to Pennsylvania but there wasn't much to stitch. I thought the little hearts from one of the patterned papers would be a cute way to "locate" where we drove to.
The paperclip makes a fun embellishment for the journaling spot. The sentiment that was on the original spot didn't work for me so I covered it up with another piece of patterned paper with a subtle pattern suitable to write on top of.
I came into the whole Project Life thing a little late and really am overwhelmed at the whole idea of documenting every day of my life. But that doesn't mean I can't still use the format in a manner that is fitting to the way I scrapbook and remember our journey.

GCD Supplies: Special Delivery Collection - Patterned Paper #2040, #2042, #2043, #2046, #2048; Paperclips #2054, Brads #2053, Label Stickers #2052


7.26.2013

Yum Yum Eat Em' UP!

Good morning!  Amanda here today with a fun and easy way to decorate a cup of candy.  I love giving gifts of candy.  They are inexpensive, easy to put together, and very well-received. 


The cup decor is simple--a triangle banner and a bicycle.  Doesn't the candy make it look delish?  I created a coordinating tag by trimming and punching a journaling card.  Yum! 

Isn't that little bicycle the cutest?  I fussy cut it from a journaling card on one of the 12x12 prints.  The bright yellow makes it perfect for a summertime gift.  


I made the banner by cutting triangles from patterned paper and stitching them together.  I attached the banner to the cup with a couple of well placed glue dots.  

Hope you are having a fun and happy summer! 

Supplies: From the Sunkissed collection: Lazy Days 2067, Tickled with Sunshine 2065; ivory jute twine (May Arts); candies (Sixlets)


7.25.2013

Staying Cool With A Cute Drink

Hello everyone! Nina here with a fun soda tag for the treat week!


Supplies:
All paper from Sunkissed 6x6 paper pad #2069; flower, tag and sentiment stickers from Sunkissed Labels #2071; blue border from Sunkissed Borders #2074.

I started with a tag sticker and a cool strip pattern from the 6x6 pad.

I cut out the flower on the right, punched out another flower from the circle sticker and cut out the center to stack them together for a dimensional look.


I then backed the tag with some white cardstock, adhered the border and cut out.


Feel free to complete the sentiment to say "Sending You Sunshine" or "Hello Sunshine". They both go well with the theme. What do you think? ;)


Thank you for stopping by! Happy Crafting!


7.24.2013

Let's Head To the Beach

I am amazed at the many things we can create with paper. The possibilities are endless. Since it’s the summer month, I decided to push the envelope a little and try to create a beach bag from paper. I’ve sewn bags before so I used that experience to put this project together.  I made a few changes since the paper cannot be turned over after stitching and at the end, I found that nothing is impossible with paper and a dose of the right inspiration.


Instructions:
1. Cut a 3” wide strip from 12x12 paper. Score the two long ends on the ½” marks and fold. Repeat the process on another strip.
2. Sew the strips on two 12x12 sheets of identical papers.  To connect all strips, sew a stitch on the last fold and then adhere the edge to the paper. *Since this is paper and cannot be turned over to its right side so you will create the look of sewn edges without actually sewing the last strip to the bag.
3. Cut another 3” wide strip and score the long ends on the ½” marks. Add adhesive to the folded parts and adhere on the bottom of the bag. Add a die cut border on the front side of the bag.
4. Cut 4 1 ½” strips from 12x12 paper.  Score the one of the strips on the ½” mark, fold and overlap two together. Connect the strips with some machine stitch. Repeat the same process on the other two strips to create handles.
5. Round corners of the handles and place on the top center of the bag. Attach some big buttons on both ends with embroidery floss.
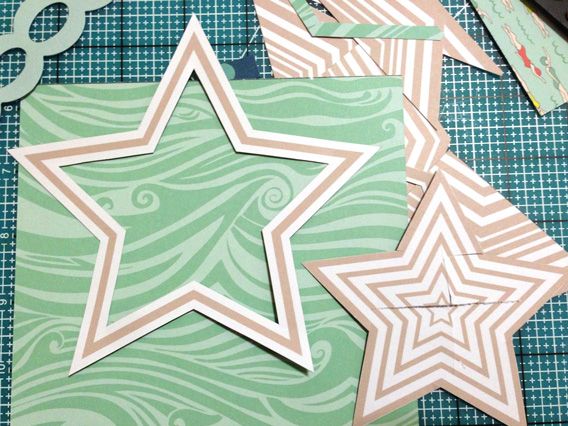
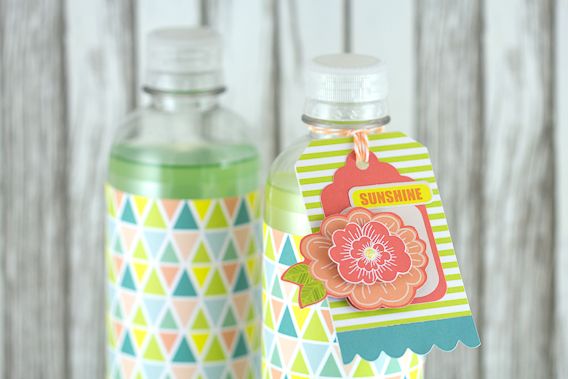
6. Decorate the front of the bag with paper, flowers and stickers.
*This bag is for decorative purposes only. Using it near or in water will damage the bag.


 Here are some close up look at the finished project..


Summer Lovin’ Paper Beach Bag
Size: 12 x 22”
Products Used:
Sunkissed (#2057 Sassy Swimmers; #2061 Pretty Swimsuit;  #2065 Tickled with sunshine; #2033 Label Stickers; #2036 Die cut borders)
Other Supplies:

Flowers, Buttons, Embroidery Floss, Photo Corners, Thread, Sewing machine, Corner Rounder punch, Adhesive

Have a fantastic day,
Grace
Grace Tolman Badge photo 2013-DT-Badge-Grace-Tolman_zpsa3db2794.jpg

7.23.2013

Get Your 1 Inch Circle Punches Ready

Hi everyone! Julie with you here today sharing a layout I made with the fun fun fun Sunkissed Collection! 

Recently I read a book called, "The Dog Lived, and So Will I" - and it was about a woman who's Beagle Dog survived cancer, and then soon after he had been gone through his cancer treatments, she developed Breast Cancer - and she focused how she was determined to beat cancer, because if her dog could live, so would she.  It was an inspiring book, and I just loved her attitude and humor.  

After reading the antics about her Beagle, it made my heart ache for my Beagle, Buddy that we lost 6 years ago. He was a joy, so fun, and even though he was diagnosed with Diabetes soon after we adopted him, and even went blind from his disease, he always came to help me wake up my son Adam every morning! Adam isn't a morning person, so having Buddy helped get him up in the morning! :) 

One morning, once I got Adam up, he flopped onto the bedroom floor and laid down next to Buddy and I just COULDN'T resist this photo op! LOL! 


I made the heart by punching several 1 inch circles and then when I had a piece of one of my 12x12 papers with negative circles all the way around it, I used that paper as a mask for my border edges

 One of the Die-Cut borders that comes in this collection has these little punch out circles in it.  I punched them out and used them as confetti on my page 


The alphas in this collection are white, and I was afraid they wouldn't show very well on the background paper I used, so I used some dark brown colored mist and 'colored' them darker to make sure they showed up on my page! 

Thanks so much for stopping by! ~~ Julie 


Julie Tucker-Wolek Badge photo 2013-DT-Badge-Julie-Tucker-Wolek_zps630a9cba.jpg

7.22.2013

Dress Up Your Treat Bags


I love gift giving and I love making gift bags!  One of the best gift bags to decorate are lunch sacks!  Yup those little bags your mom packed your PB&J in are so easy to create with!


One of the best features about these bags are when they are folded flat you can use a boarder punch on the top and it cuts all the way through so its a nice even punch!

I used the Sun Kissed Collection from GCD Studios to decorate this bag!  I created the cute little flower  from a fan fold die and it was the perfect embellishment next to my 'yum, yum, eat up' up' sentiment!


This was simple to make but it will surly brighten someones day when its filled with home made cookies!

  Sara Zinger Badge photo 2013-DT-Badge-Sara-Zenger_zps5445a340.jpg

7.19.2013

Pull Out Those Border Strips

Hi my name is Christine and I am addicted to border strips.  There, I said it, and I feel better!  Today I am here to share today one of my favorite ways to use border strips!
Bet you are looking at my card right now and wondering where in the world the border strips are...I love to take them and fold them into medallion flowers creating unique flowers.  I used two different scallop borders to create these ones and as you can see they have a slightly different look from your perfectly round medallion flowers.  So the next time you pick up a border, stop and think if there is an out of the box way you can use it!

Supplies Used:
Sunkissed Border Strips #2036
Sunkissed Label Stickers #2033
Sunkissed "Pretty Swimsuit" #2061 Paper

7.18.2013

A Shinning Star

Hello everyone! Nina here with a star shaped card for summer!

Supplies: 
All paper from Sunkissed 6x6 paper pad #2069; sentiment from Sunkissed Labels #2071

My favorite paper in the pad is the nesting stars / wave. The 6x6 star paper is perfect for a shaped card. I started by cutting the center out to create a cool negative space for the wave pattern to show through.


I then curled some scrap from the swimming girl paper to create some fun dimension for the card. Attached to the back with scotch tape.


The floral cluster was cut out from paper in the same pad. And I picked the perfect sentiment  from the Sunkissed Label sticker sheet to finish my card.


Thank you for stopping by! Happy Crafting!


7.17.2013

A Charming Summer Birthday Card

Today I am showcasing a birthday card using GCD Studio's Sunkissed Collection. When I think of summer, I think of weddings with beautiful bouquets like this one:
It got me to make a birthday card using my summer inspiration!
Oh the things I would do again if I only had Pinterest to help me with my wedding! I hope you are enjoying your summer! 
Supplies: Papers GCD Studios Sunkissed Lazy Day A & B Stamps: Avery Elle Handwritten Notes Embossing Folder: Lifestyle Crafts Woven Dies: Penny Black Other: Adhesive pearls GCD Studios Ambrosia Wida Miller Badge photo 2013-DT-Badge-Wida-Miller_zps32a1aa68.jpg